Forum Replies Created
Posted In: Christopher Younger
-
Participant
Having Aircraft Spruce in your backyard is a blessing and curse at the same time. I have spent $$$ I didn’t plan on spending because “it’s just right there”. Also, when you’re a friendly chap like I am, you end up picking up orders for your friends while forgetting to get your stuff!
Also, just to rub it in, AS West offers such excellent service that they will shuttle you to and from KAJO or deliver your order directly to your tie-down/hangar! If you are near a AS store near an airport, call the store and ask if they have that shuttle.
ParticipantOddly, but related to this…. My right main quick is now leaking. I think it’s jealous.
This time, I’m replacing both main tank quick drains and putting this issue to bed!
ParticipantLate welcome, Alyssa!
I’ve been lurking on this thread as my 235 came to me with similar squawks. My fuel quick drain on one of my tip tanks is finicky and leaky and you really have to play with it to seal after draining fuel. I first tried just cleaning my quick drains (they were filthy!) I purchased a couple of new CCA-1550 Curtis drains but haven’t installed them yet (had a mess draining fuel, so flying to burn the fuel out a bit). Install looks easy enough, I have the special socket for the CCA-1550 as well as the sealant for the new quick drain thread. I’ll see how a new one goes.
The other is the main struts. I had them both serviced as soon as I got the plane because they were collapsing to full compression during taxi. One of them still seems “leaky” (a little dried strut juice from the left main strut service port on top of the wing after every flight). I want to try Granville’s next. The A&P that serviced them didn’t want to use it (!), so I’m going to go to another A&P that will. :/ After that, full rebuild would be the next step.
I will say, after the mains were serviced, they feel like landing on pillows now. So that’s good, right?
I’m kinda in the same spot you are. Got my ticket back in March, bought my 235 and now building hours while studying for IFR. Best time I’ve had since I learning to SCUBA dive. 😉
Enjoy the plane!
ParticipantIt was a fun first project and I am glad it was both relatively easy *and* within the powers of owner maintenance. 🙂
Aircraft janitor sounds about right. I do enjoy cleaning though–maybe I should consider a 2nd career as an A&P? 🙂
Yeah, my wife (Redhead with a mechanic mind-set) suggested looking at the ground as well…spraying the ground connection with QD got me intermittent connectivity which is why I went further.
I even made myself a little template for inserting owner maintenance entries into my aircraft logs to satisfy future A&Ps, the Feds and DPEs.
I’m an IT guy by trade, so I tend to get a bit OCD. Apologies in advance!
If I could figure out how to post videos I’d post the final product. She’s bright and ready for me to get my night currency back! 🙂
ParticipantThe beacon was a bit of a different animal.
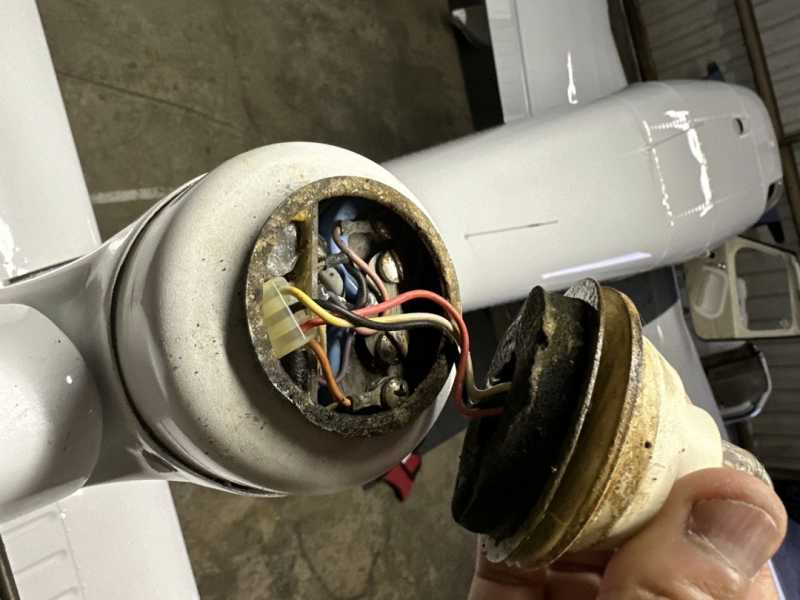
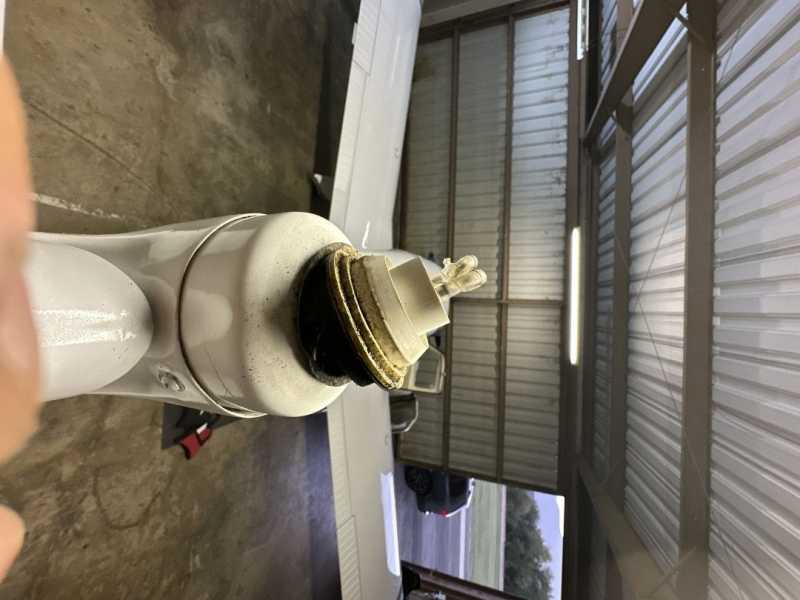
First, I had to break out the ladder, obviously. There’s a metal collar that secures the lens to the top of the tail and presumably seals the wiring at the top from the elements. Well, that 60 year old collar and screw were rusted beyond belief. Multiple applications of WD40 and I was able to wrestle the screw out and remove the collar. This is when my heart sank.
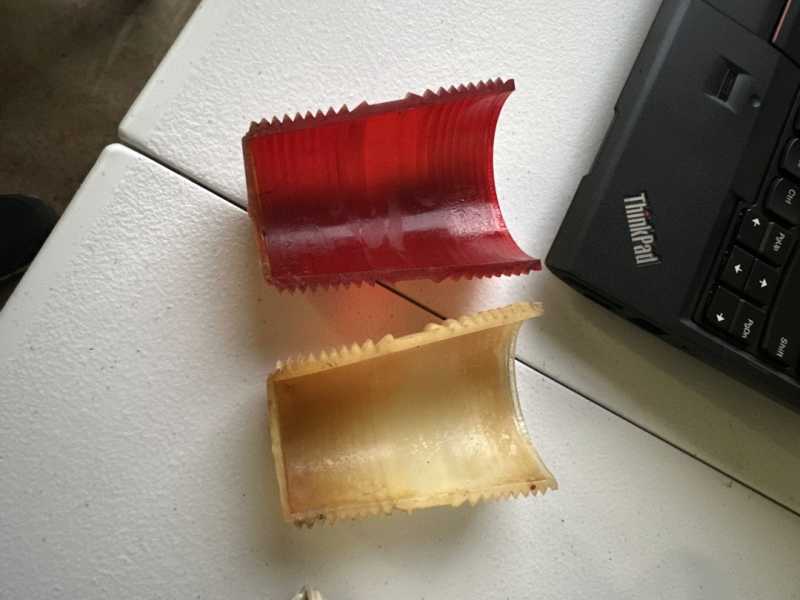
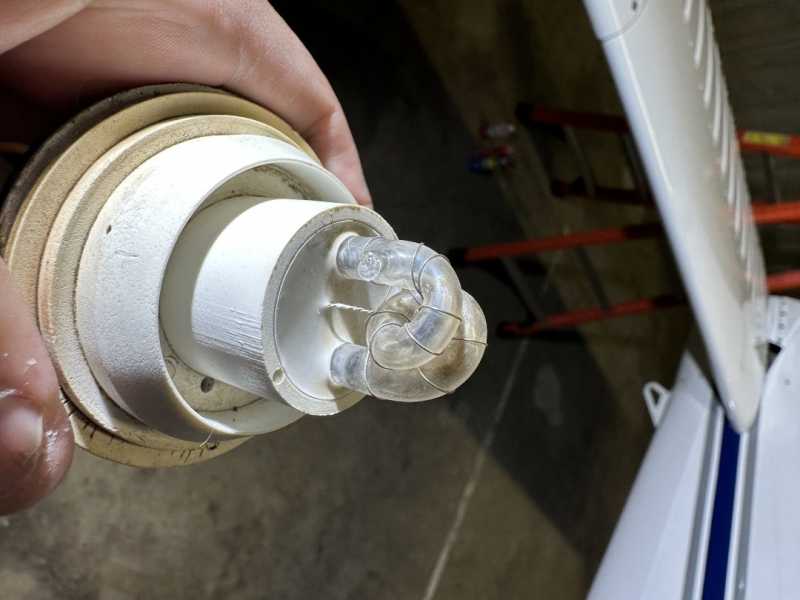
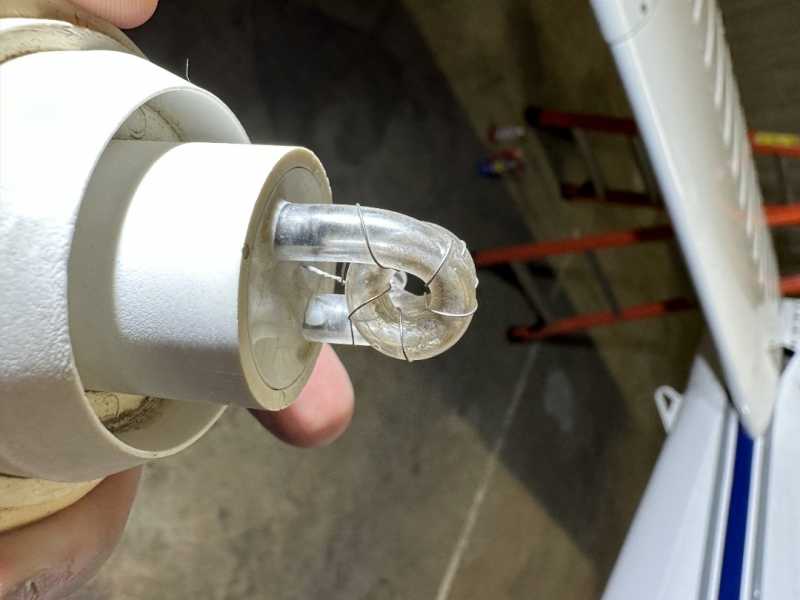
My Cherokee 235 has Whelen old-style strobes in the beacon and on the belly for anti-collision. The belly is a clear dome lens. The beacon strobe is a split white/red lens. The beacon split lens was compromised years ago–I’m surprised it lasted as long as it did. After I got it off, I found the strobe moist, covered in mold and nastiness and some corrosion on the metal plate. I disconnected the strobe (3-pin plastic connector) and the connectors did not look too bad.
First, cleaning. Again, QD contact cleaner sprayed on every exposed electrical connection (both the strobe and upper eletrical “bay” in the tail) with a light wipe down to ensure dryness. With the strobe, I spent some time with WD40 and QD doused pads cleaning all the mold and corrosion from every nook and cranny I could get into with small tools. The strobe cleaned up very well.
Next, I tested continuity with a multimeter to see if the strobe connector would pass electricity. Multimeter gave me a PASS for continity. Alright! Plugged the strobe back in and tested. Beacon strobe was operational again!
But the old lens and collar screw were just too far gone to restore. They’re almost 60, see how *YOU* compare to your younger self. 🙂 Fortunately, not only does Aircraft Spruce sell the entire assembly, they seel the individual pieces. Even better, I’m based out of KAJO, Aircraft Spruce is 5 mins away. Ordered a new split lens, gasket(!–there wasn’t one when I disassembled), and collar (which included a new screw). Reassembled my beacon using the new parts and tested. Brighter than ever!
I hope this helps someone down the road. These were my first maintenance items on my first airplane–so I was nervoud and frustrated but came out the other end excited and proud of my bird’s new lights!
ParticipantExtended troubleshooting session went well! The Piper Service Manual wasn’t much help unfortunately, but I was able to figure out 1960s electrical wiring.
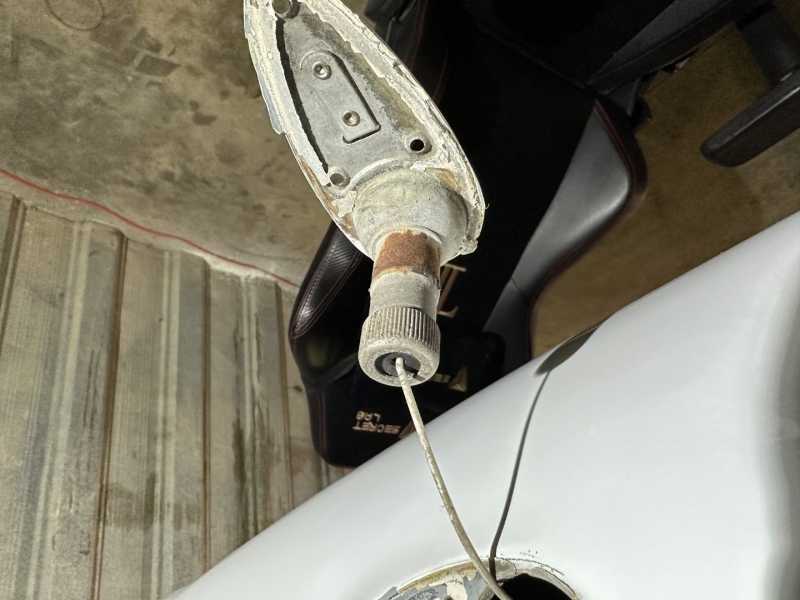
Started by opening the maintenance port underneath and closest to the tip tank and disassembled the nav light on the left wing tip.
One screw on the outside and removed the lens and cover
Removed the bulb
Removed the three screws to liberate the nav light mount (had to break paint for this)
Inside the maintenance port, sprayed QD contact cleaner inside the positive terminal and all over the ground connection
Needed to use WD40 to free-up the corrosion-seized screw-on retainer for the spring-loaded bulb contact
Cleaned all components with QD and light wiped all visible corrosion
Coated all contact points (ground & ground contact to mount, positive contact and area) with dielectric grease
Reassembled all components (the ground contact plate on the inside is tricky!)
Coated the bulb contact area and reinstalled.
Test with ship power and nav lights selected–cycled power multiple times to confirm operation
SUCCESS!After all that , I installed the new LED bulbs (NavStrobe Sextant 45W). They are bright and have an option to strobe (red/green, not white) if you cycle power to them.
Next reply is about the inop beacon…
Attachments:ParticipantI just installed my PAR361PL. It came with a new gasket that replaced the OEM landing light’s gasket.
ParticipantLurking on this thread as I am replacing my landing light with a WAT PAR361PL as well.
I accidentally bought a PAR46 first and it came with a gasket, did the PAR36 not come with one?
ParticipantAll good advice!
I was trained at a Class D under ONT’s shelf, so I was thrown into radio procedure early. 🙂
And definately will stay in shape on short field, my home airport is ~3000ft, fortunately the 235 drops like a brick and has good brakes–the finesse of not having to use them aggressively is what my CFI and I will be working on. 😉
I took a flight out of SBA (where’s she getting some repairs now) and yeah, busy space around LA and north, but I was trained well. Plus, I’m a CAP Mission Observer, so radios are something I deal with alot already.
If you’re in Paso, we may run into each other: my wife’s mission for us is visiting her sister in Santa Ynez.
And maintenance and upgrades, yes. I will be asking lots of questions soon. I have so many already!
-Chris
